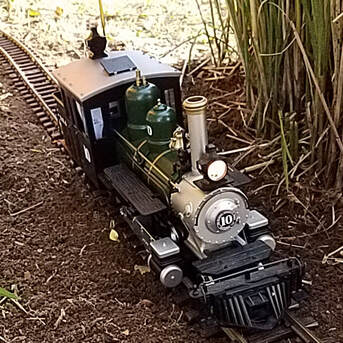
Forney #10Sandy River & Rangeley Lakes Railroad #10
2-4-2 Forney LGB 27253 Running on: Battery Power Brought to LHRR: January, 2018 This engine was my very first model train that was mine alone. I bought it at the Amherst Railway Society Train Show. I love steam engines and this classic American design is something that I consider to be a timeless look. |
|
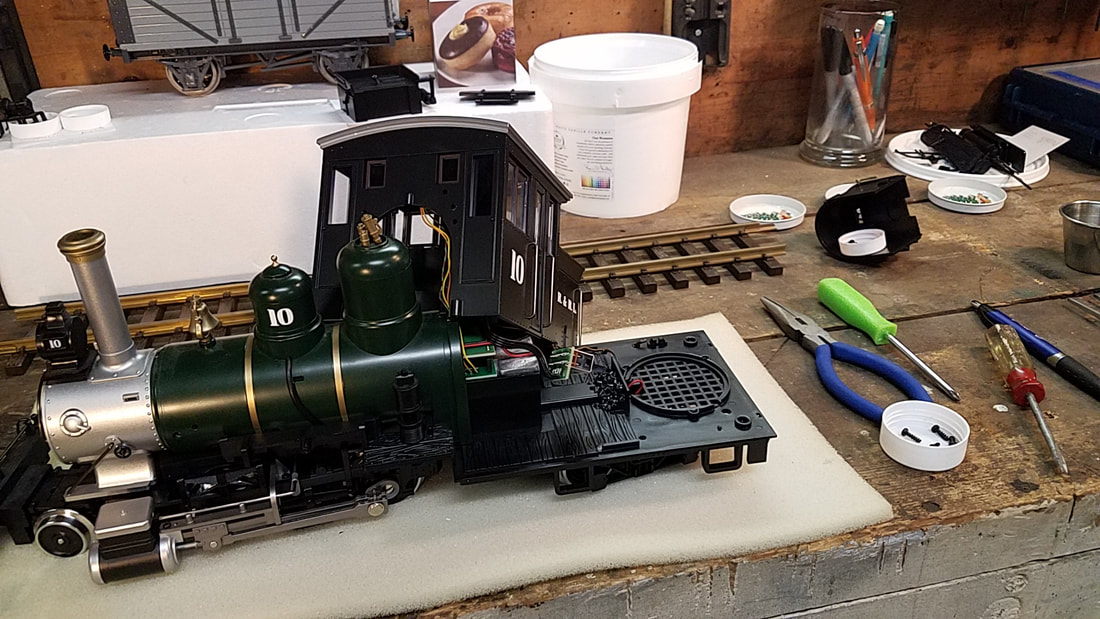
Disassembling an LGB Forney
This is my guide for how I've taken apart my Forney time and time again. I used diagrams from LGB to help me understand what is where when I first took my loco apart. They may help you too! But, if you're still stuck, don't hesitate to reach out and ask me a question.
1. Removing Decorative Pieces
- Remove the catwalks on either side of the boiler via the single screw that holds each one in place.
- Pull out the grab rails next. Start with their black supports then careful angle the gold railing out of the hole in the front of the cab.
- Next, pull out the black tubing on the sides of the boiler. They don't have any screws.
- The last thing to remove is the catwalk on the front of the loco. Pick up the front end by the smokebox so the pony truck hangs down freely. Grab the catwalk and slowly slide it forward. It'll come right off. This is necessary to get the smoke box off.
2. The Cab & Bunker
- Remove the ash dump from the bottom of the cab.
- Then you can access the 6 screws to pull off the cab / bunker. Be Careful! The cab is attached to the loco by the wiring for the lights. Once you get the boiler off you'll be able to disconnect the wiring.
- There are two smaller screws that are under the ash dump that hold the firebox in place. Remove these next. You'll be able to pull out the firebox a few inches. There are two screws holding the switch in place. Unscrew these and you can pull the firebox away and set it aside.
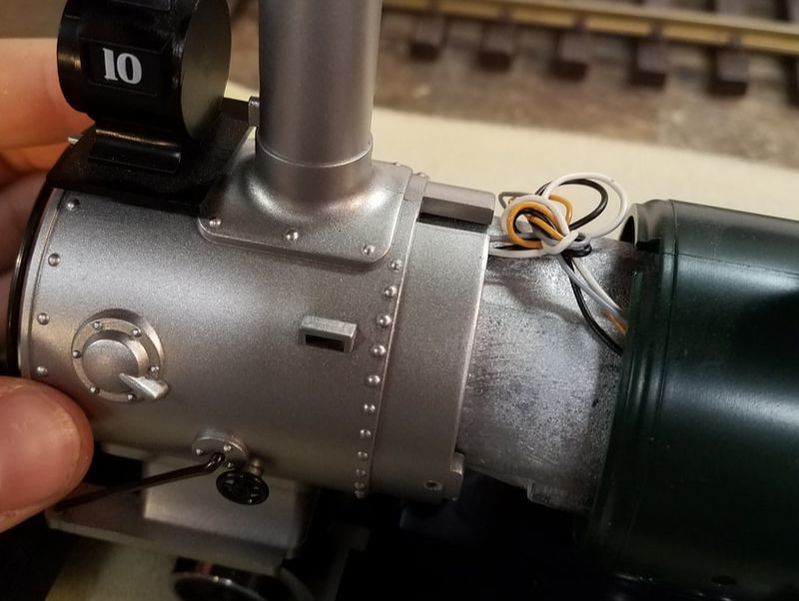
3. Boiler & Smokebox
- To remove the boiler and smokebox you have to remove the screws on either side of the loco. There are two larger screws between the gold bands on the boiler and two smaller ones right behind the smokebox on the boiler. Be very careful with the smaller screws! Mine were stripped.
- The smokebox comes away first. It'll come forward, but there is a pin in the bottom of the piece. As when pulling off the catwalk, lift up the loco's front end, push down the pony truck slightly and wiggle the smokebox out. It's easier than it sounds, just watch what you're doing.
- NOTES: Let the smokebox hang to the side while you pull out the boiler. You'll be able to disconnect some of the wiring in a minute. The boiler is a slightly odd shape. The bottom is mostly empty space, except for about 1" in the front that holds the boiler in place.
- Pull the back of the boiler straight up so it's at an angle. Now you can pull it forward a few inches.
- To finish pulling these off we need to do some work with the circuit boards...
|
|
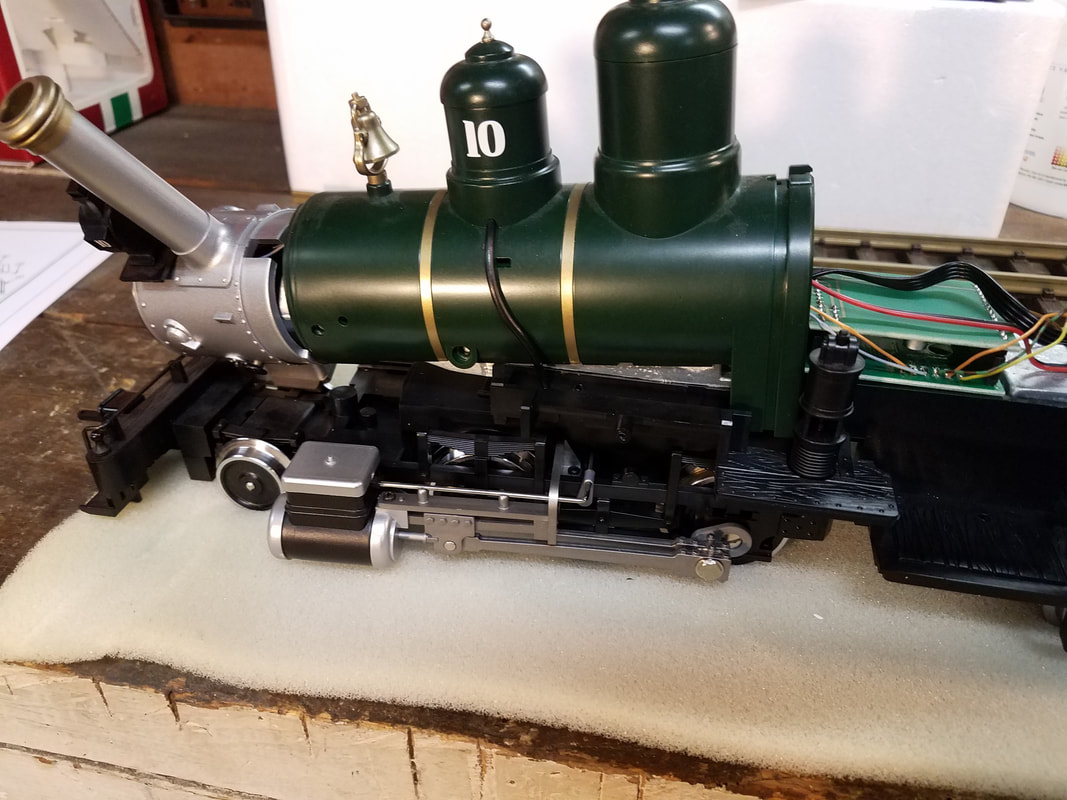
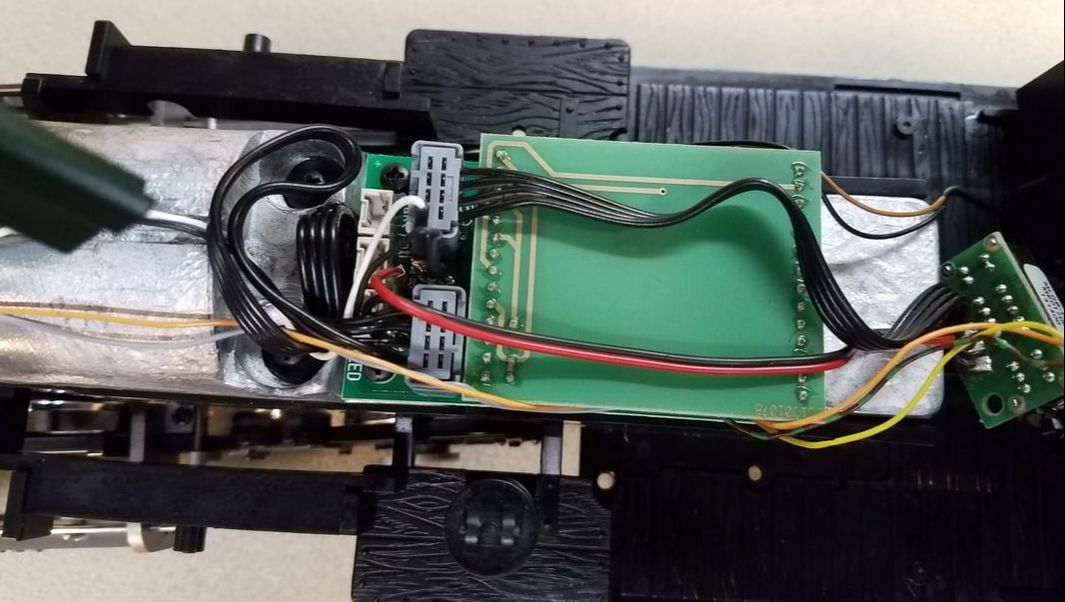
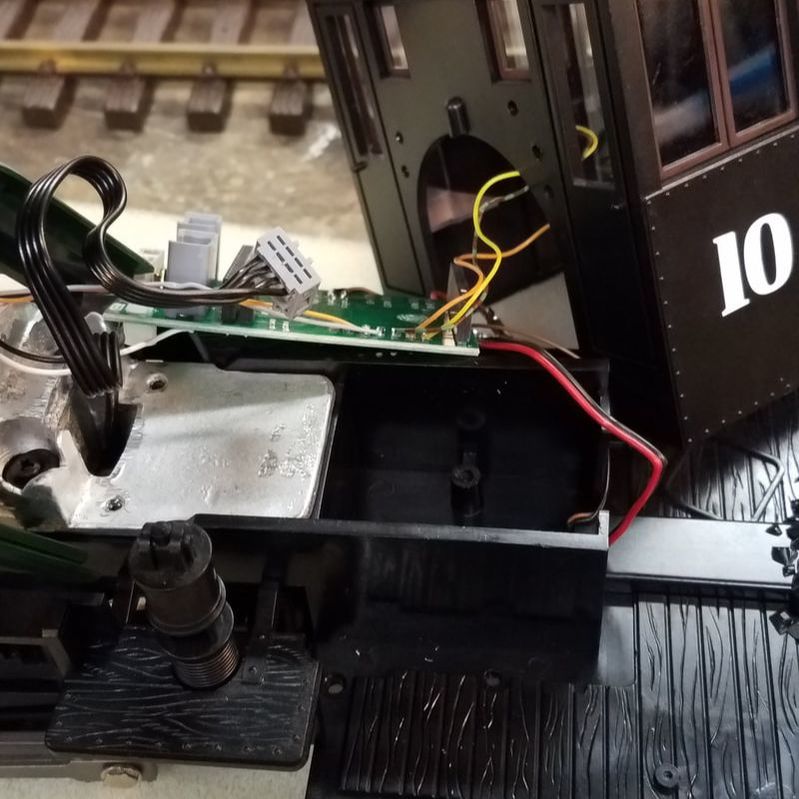
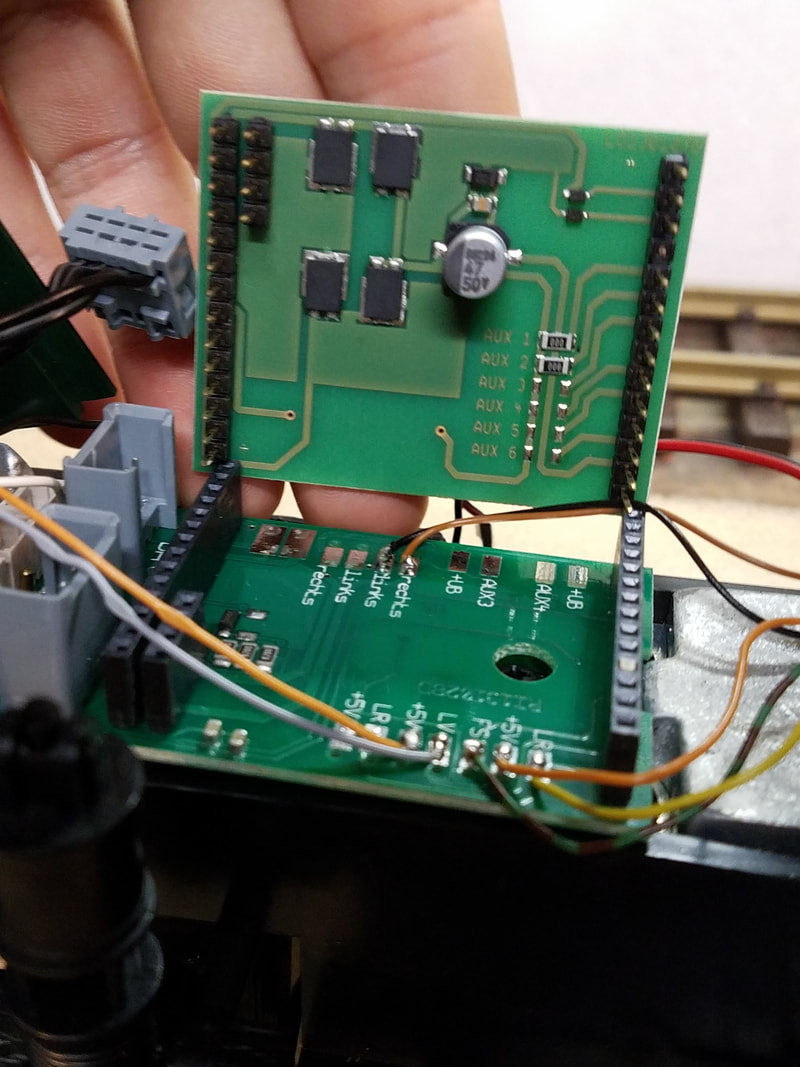
4. The Circuit Boards
- Pull off the two 4-pin connectors on the bottom board. This will completely detach the switch from the firebox. Set it aside. The other is for the motor block and track pick-ups.
- There are also 4 single-pin connectors wedged between the others. Pull these all off. It will make getting to parts easier. However, some things are soldered to the board, so the only way to get them apart is cut the wires. I did cut them because I'm changing the boards in my loco.
- However, you can leave them and still get the loco apart, it'll just be a bit trickier...
- Next, carefully and evenly pull the top circuit board off the bottom one.
- Now unscrew the three screws that hold the circuit boards in place. Once those are free you should be able to pull away the smokebox, boiler, and cab (which should all be connected by some wires).
|
|
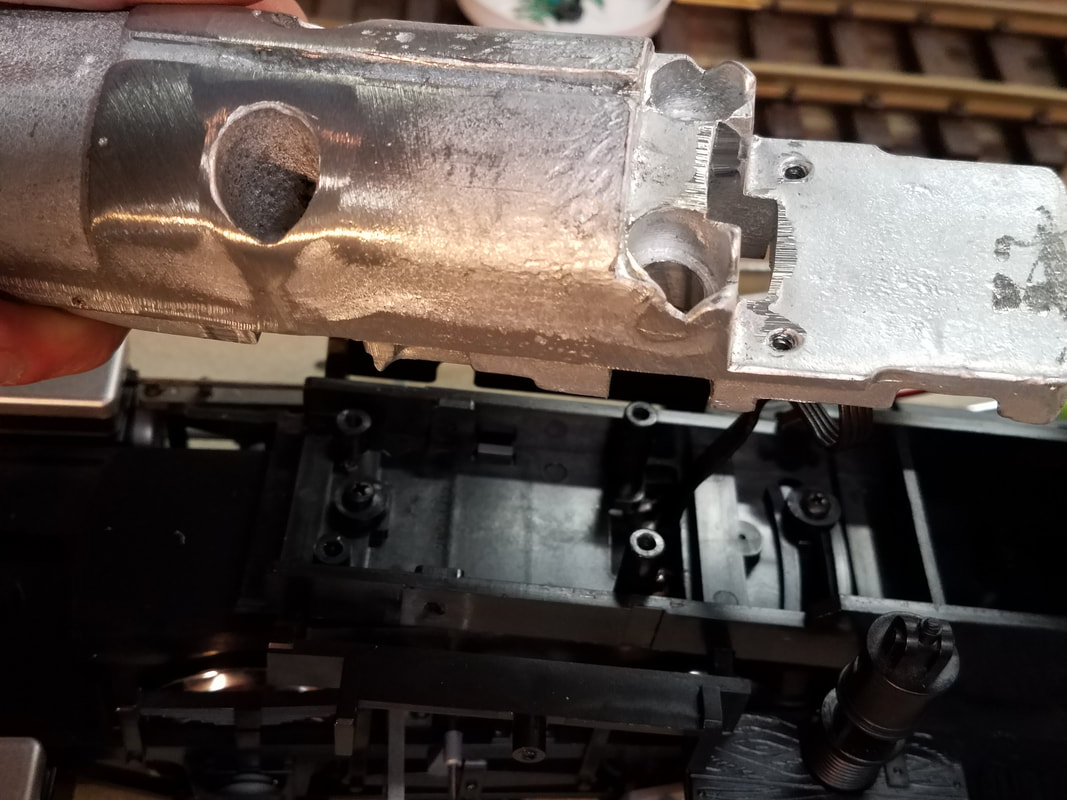
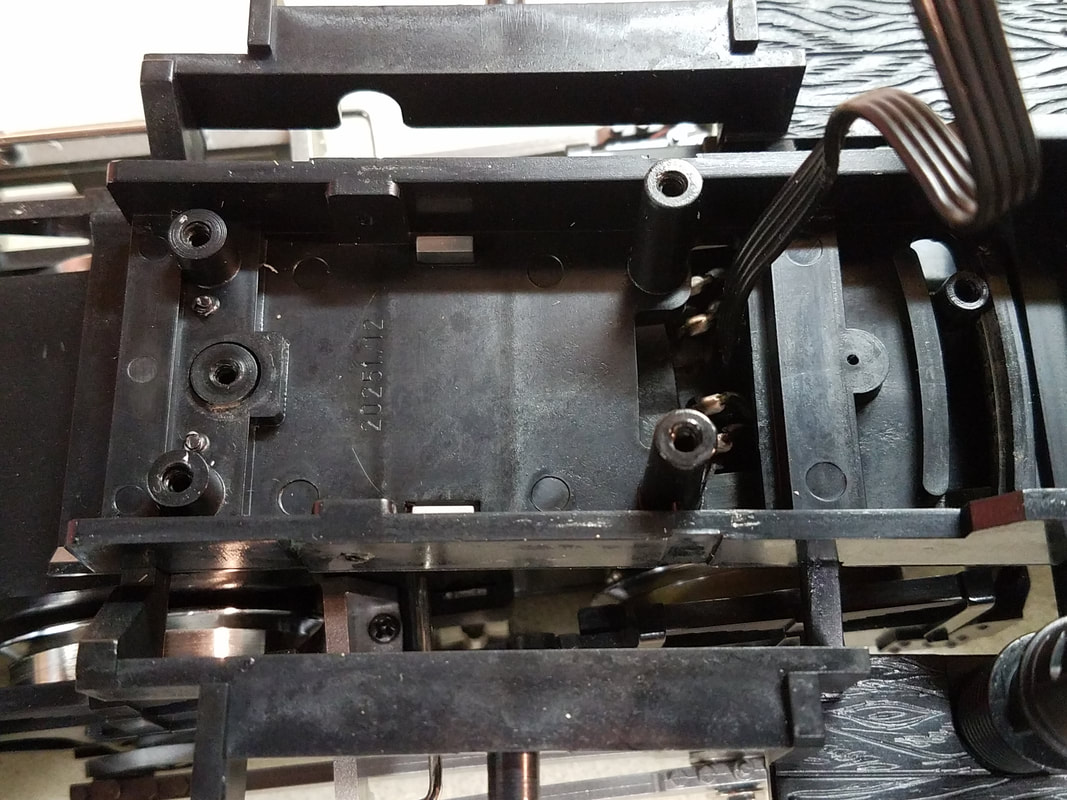
5. Weights & Motor Block
- You don't need to remove the smaller rear weight to get to anything else, but the front (larger) weight needs to come out so that you can access the motor block. There are three screws that hold the weight in place. As you're pulling off the weight be aware of the wires that run through it.
- There are two screws with washers under the weight that hold the motor in place. You can see them in the left pic below and they are removed in the right pic.
|
|
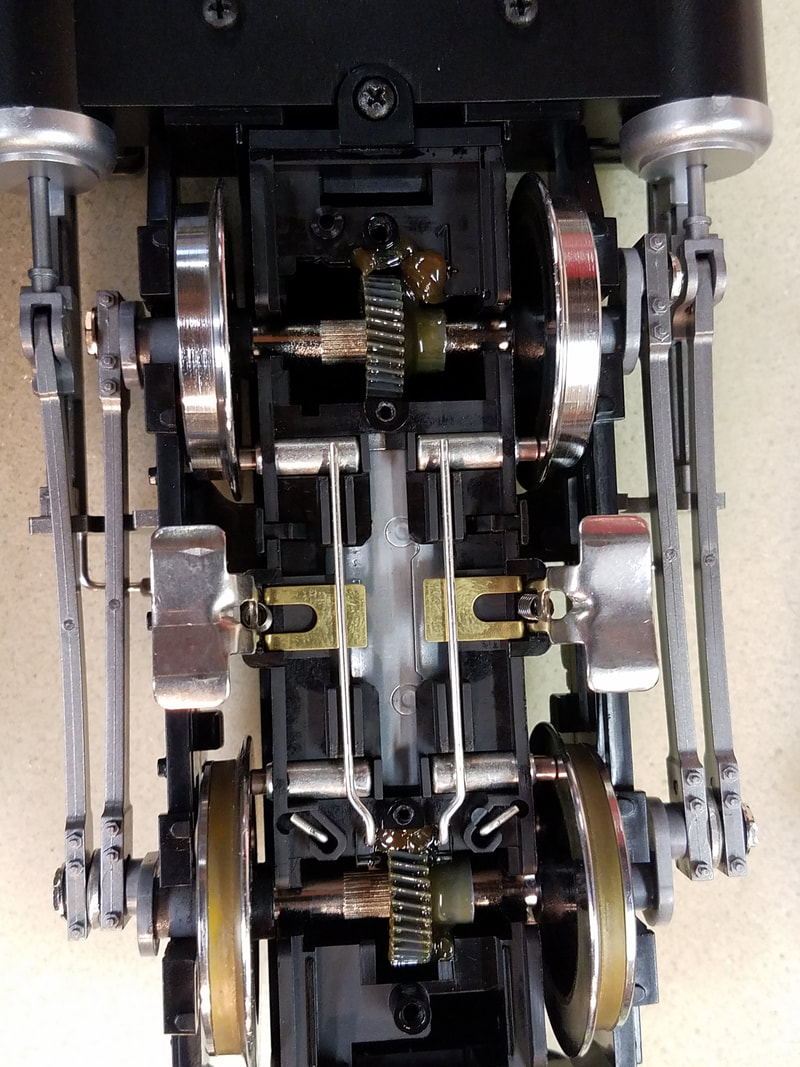
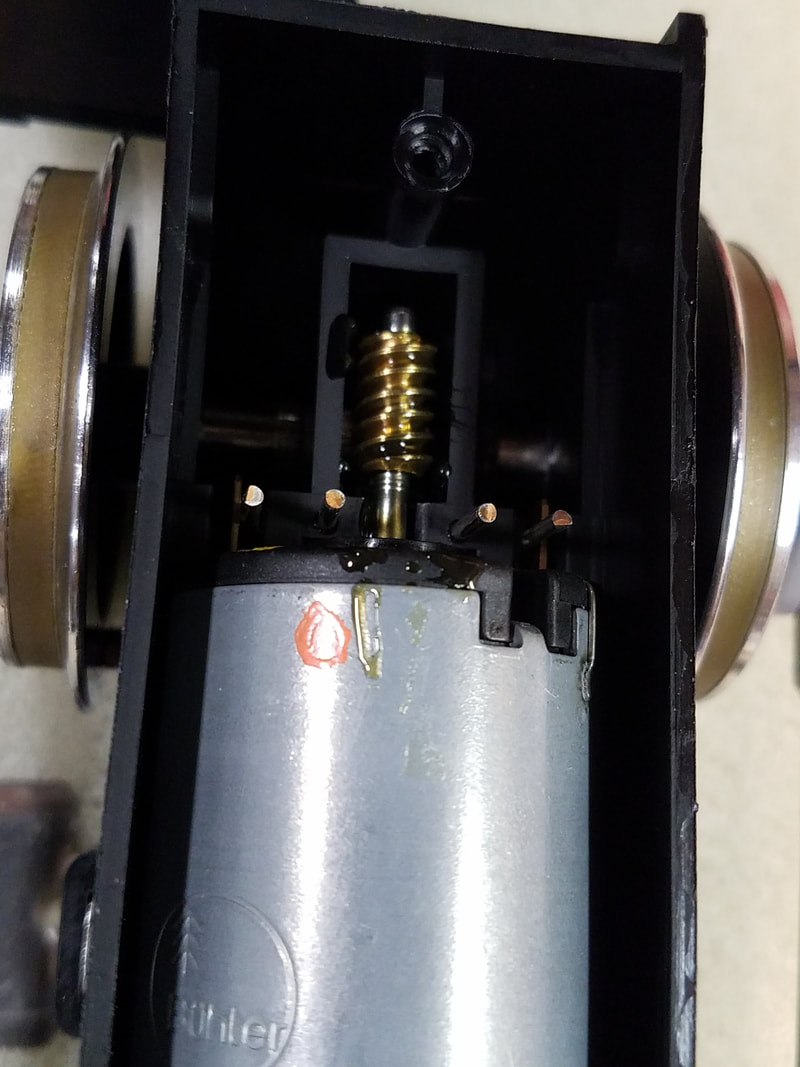
6. Inside the Block
There are only two reasons I can think of that one would need to access a motor block of any loco: to replace a part or to grease the gears. As you can see, mine are well greased (it's brand new!) but I got into the block to figure out what pins are which on the 4-pin connector. As you can see from the photos the two outer pins are for motor power and the two inner ones are for track power pick-up.
To get inside...
To get inside...
- Flip the loco over. There are 4 screws on the bottom of the motor block.
- Removing the inner screws pulls off the bottom access panel. (Left Picture)
- Remove the outer screws will let you pull the motor block away from the chassis. Once you remove them the only thing holding the motor block to the chassis is the side rods. I left those in place and still was able to access the motor as needed.
|
|
7. Put it back together!
I was very careful to keep everything separate and labeled properly as I pulled my loco apart. There are many screws and they all look so similar! I suggest you do the same with any loco you may pull apart. This will making replacing and reassembly much easier!
